How to Create a 4x6 Red & Blue Photo Pass Background in Photoshop
The red and blue backgrounds are usually used for 4×6 photo passes which are used on ID cards, driver’s licenses, PASSPORT, Marriage Books and even to apply for jobs, here we use Adobe Photoshop software to create red & blue backgrounds.
The red and blue photo backgrounds are synonymous with formality in official documents, there are odd and even years of birth, which makes them use red and blue for various purposes.
A few years ago, they only had little access to photography, if in the past, to make a photo pass with various functions, you had to always go to a photo booth that was taken several times, paying Rp 20,000 – Rp 50,000 excluding photo drop, then not now.
With a cheap smartphone and a photo with a background of rice fields, mountains, at school, maybe even at the mall, as long as we pose formally with neat clothes, we can change the photo background to the desired color.
The key is that we have to know how… well, while most people still don’t know how to change the background color of their own photos, you are lucky to be here to practice the tutorial below.
Here we will use (2) two methods, namely changing the background from a free background and changing the colored background as needed.
Function & Purpose of Red and Blue Background Photo
If you are still confused and don’t understand why you have to make a red and blue background, especially for those who are still in elementary / middle school, we will give you the reason.
1. Official Document Photo
Every official state document only uses two background colors, namely in making an ID card, driving license if you are at least 17 years old and if you want to apply for a job by attaching a CV, you usually need a red and blue photo pass.
2. Odd & Even Birth Special Color
When are blue photos and red photos used?
- Red photo background; used for odd births (1995, 1997, 1999, 2001, 2003, 2005, 2007)
- Blue photo background; used for even births (1996, 1998, 2000, 2002, 2004, 2006, 2008)
If you are going to print photos at a photo printing place, you don’t need to hesitate, because the officers already understand better, you just need to mention the use and year of birth and everything is fine.
How to make a red & blue background in photoshop if the background is free
If the initial photo is a free background, it means that the photo background is still raw, there are different steps compared to photos that are already red or blue.
Here we will do the technique from scratch, from cleaning the backgorund, to changing it to the desired color, this is how to make a red and blue background in Adobe Photoshop.
1. Photos using HP cameras or digital cameras, transfer to PC.

2. Open the Photoshop application.
3. Click File > Select Open > Select the file you want to use as a photo.

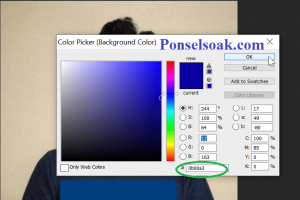
4. Change the main color and the second color in the toolbar on the left. Double click on each box.

5. Select the desired color, whether blue or red (same color code as the previous tutorial above).
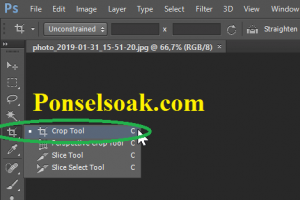
6. Edit the photo size to fit the photo size by means of Crop using the Crop Tool.
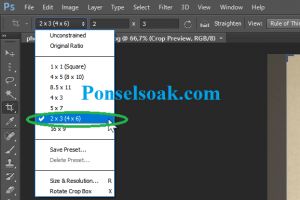
7. Change from Unconstrained to size 2 x 3 (4 x 6).
8. Adjust the size and slope, if it’s okay click the check mark.
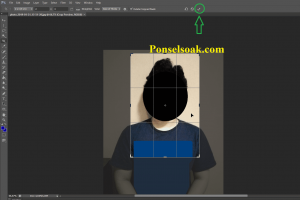
9. To change the background, use the Magic Wand Tool > Click on the background area (the selection area is a dotted line)
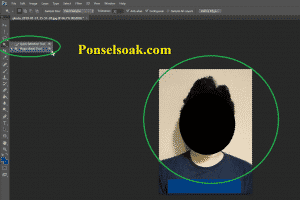
10. To remove the previous background press CTRL + X (Cut). The result is like the image below.
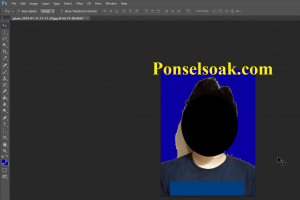
11. Click again the area that has not been replaced using the Magic Wand Tool again > Cut.

12. If there are remnants of the background, it can be trimmed using the Brush Tool.
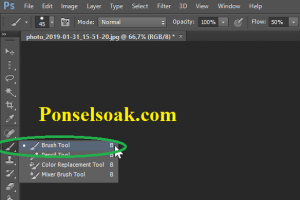
13. When you feel the results are neat (like the example below), Save the edits according to the desired file type.

14. Passport photos ready to use.

Now, for free photos, there are still a few shortcomings because here the clothes are still in the form of t-shirts, but friends, please adjust them directly using a white collar shirt to make it more formal, or other shirts that don’t have many motifs and are calmer.
What if the photo is in the background of the forest or someone else?
In principle, it is the same as the steps above, no need to be confused.
Can Photos Be Free To Use As Photo Passports?
Of course less, if what is meant is for a formal photo, then it would be better if the clothes used were also formal as needed.
Changing the Red Background to Blue & Blue to Red
If you have done photos and edited as above, and are confused about how to change the background color to another color, red or blue, this tutorial will answer your confusion so far.
1. Open the Photoshop application.
2. Click File > Select Open > Click.

3. Select the file you want to change the background to > Click Open.
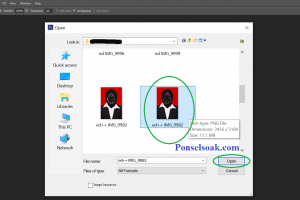
4. On the left of Photoshop select the Paint Bucket Tool > Click.
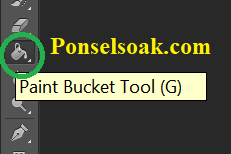
5. After clicking, the Paint Bucket Tool icon will be on the left toolbar.
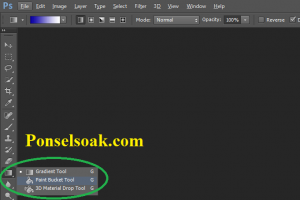
6. Once the Paint Bucket Tool is active (marked by the cursor changing to the shape of a spilled bucket), click the icon marked with the arrow below to select a color.
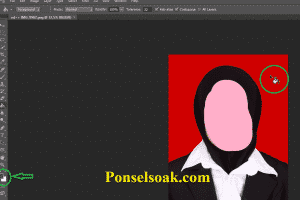
7. Select the desired color. (Red color = #db1514, Blue color = #0b00a3) > Click OK.

8. Click on the background, the result is as shown below.
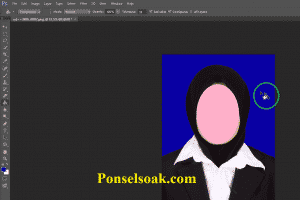
9. Save the image by clicking File > Save As… > Click.

10. Select the desired image format (generally a PNG or JPEG file) > Click Save.
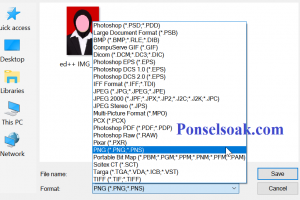
11. If a box like the one below appears, select it according to your needs > Click OK.
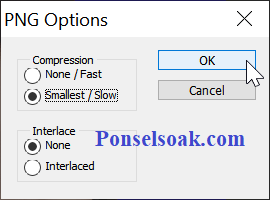
Compression = To reduce the image file size.
Interlace = Used for web.
12. Wait for a while until it is successfully saved (the length of the saving process is shown at the bottom left).

13. The photo with the changed background is ready to use.
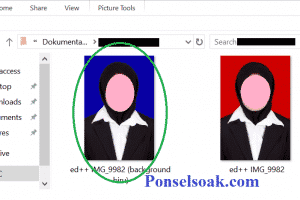
Of course, my friend doesn’t need to spend money to just change the background color of the photo, because now it can be done at home, it doesn’t even need high editing skills, because the tutorial above is complete enough to practice,
Making official documents is not that simple, so for those of you who are lazy to leave the house and have sufficient equipment such as a cellphone for photos and a laptop for editing, everything can be done at home until the blue or red background photos are ready to be printed.
Hopefully the tutorial above can be understood by my friend well and can be useful, don’t forget to share this article with your friends.


Post a Comment for "How to Create a 4x6 Red & Blue Photo Pass Background in Photoshop"